Shop in under 90 seconds with Tophatter!


This is a sponsored post.

Tophatter is a really fast online auction site. And by really fast, I mean that auctions can end in 90 seconds or less.

I see lots of electronics and jewelry on here, but there are also games, cosmetics, and more.

For a $10 credit on your first order of $11 or more go here. Or, if you’re signing up via the mobile app enter code 12f3a. I’m not sure how long the $10 off for signing up for a Tophatter account is going to last, so do this as soon as you can!

Screen Shot 2017-03-08 at 3.38.56 PM

Basically, they have multiple auctions going on all the time and you just stalk the site until you purchase something, or a few things.

You can click on items that you like to review details before you bid.

Screen Shot 2017-03-08 at 3.40.43 PM

From this screen, you can read details about the item and you can go to the seller’s page to see their rating. So far, all the sellers I’ve checked out have had over 4 stars out of 5. Most sellers seem to have a lot of items for sale.

If you see something that isn’t up for auction yet, you can “set a reminder” and your phone app will notify you when that item is up for bidding. I highly recommend installing the app on your phone.

I received a couple of credits to go shopping on here and purchased a bracelet and a necklace.

large large-1

Both items arrived within the advertised shipping time and the quality was as expected. In fact, the elephant bracelet was way cuter on than it is in the picture! I paid $12 for the necklace and $14 for the bracelet. Both great deals!

Shopping / bidding is super easy and the auction ends when people stop bidding. So, basically, the auction only lasts about 30 seconds after the last bid.

There is usually an option to purchase the item from the seller’s page without waiting for the auction but from what I’ve seen stuff typically sells for less if you wait for the auction. Also, I’ve been offered an item that I was bidding on – and lost – for just a couple of dollars more than the closing auction price. So there seems to be a lot of ways to buy. Plus, it seems that a lot of these sellers are selling overstock, so they’re new items and they have more than one available to sell, so they keep selling until they run out.

So, check them out and don’t forget to use my link for $10 off your first order of $11 or more. Or, if you’re signing up via the mobile app enter code 12f3a. And happy shopping!

Laura Story – Open Hands – Review & Giveaway

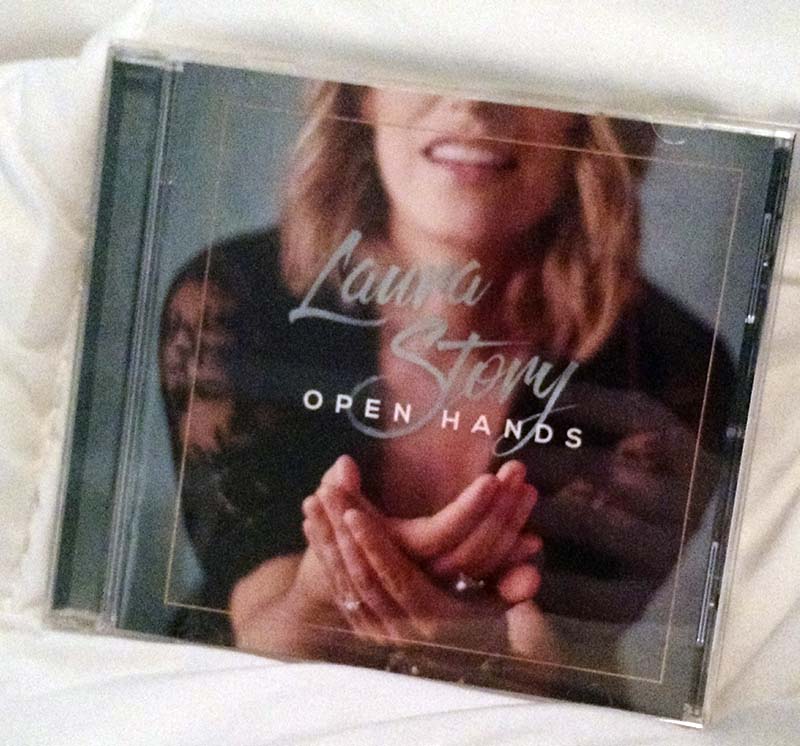
IMG_20170311_121305813I’m constantly on the lookout for new music for me and for my kids. So, I was excited when I got to review Laura Story‘s newest CD, Open Hands for free. I love Laura Story’s music and this CD was no exception.

The music is beautiful and relaxing. Both me and my children love listening to it. It’s the perfect music for listening to any time.

OpenArms

Throughout the Bible, there are countless stories of ordinary people whole-heartedly attempting to live a life fully surrendered to God’s unique calling on their lives. More than once, God asks people of faith to relinquish control and simply trust Him.

“We have this picture all the way through the Scriptures of all these great leaders in this process of surrendering everything. What the Lord is asking them is not, ‘You need to hold on tighter. You need to manage this better.’ What the Lord asks us is to surrender,” Laura offers, “It’s about learning to live with open hands, learning to live life in this constant state of saying, ‘Lord, my life is Yours. My time is Yours. My resources are Yours. All of this is Yours. Do what You will.’”

Story has built a life—and a career—around submission to her calling. She’s led worship at Atlanta’s Perimeter Church for the past 12 years. In addition to penning songs recorded by artists like Chris Tomlin, Story has found success as a recording artist in her own right. Since the release of her solo debut in 2008, Story has amassed a GRAMMY® Award, a Billboard Music Award, multiple GMA Dove Awards and an RIAA Gold certification for her massive No. 1 hit “Blessings.” In addition, she’s also the author of two books, including the latest “When God Doesn’t Fix It – Lessons You Never Wanted to Learn, Truths You Can’t Live Without.”

Open Hands is the follow-up to 2013’s critically-acclaimed God of Every Story, and in the years that have passed since her last release, Story has given birth to twins, making their brood a family of five. Now, as a mom to three kids—Josie, Benjamin and Griffin—the posture of “open hands” feels more necessary than ever before as she juggles ministry and motherhood.

Hand

“We never get to a point where we can do life apart from complete and total daily dependence on Jesus,” Story admits. “The irony is the less control we have, the more peace we have and the more, I would even say, success and joy we find. It’s a contrary picture to what the world tells us, but it’s gaining through letting go.”

Open Hands’ fresh collection of originals blends Story’s signature congregational worship with intimate moments. A parade of A-list songwriters, including Matt Redman, Matt Maher, Mia Fieldes, Hank Bentley, Sarah Hart and Seth Mosley, among others, pepper the album’s 11 tracks.

The title track—already a chart-topper prior to the album’s release—features guest vocals from Third Day’s Mac Powell, a fellow Atlanta-native and Story’s longtime friend. “You Came Running” borrows imagery from the biblical narrative of the Prodigal Son. In true Story fashion, several selections (“Awake My Soul (1000 Tongues),” “For The Love of My King”) reimagine timeless hymns, which she refreshes with an original chorus.

Reflecting on the world her kids are growing up in, Story wrote the album’s sparse closer, “Grace Abounds,” after weeks of turning on the television only to continue to watch stories of terror attacks, extreme injustice and racial tension make headlines day after day. “It’s easy to lose heart, and the song is about just acknowledging the brokenness. First of all, we can’t just pretend like it doesn’t exist,” she advises. “When it seemingly doesn’t make sense, I’m choosing to believe that God’s grace is enough. God’s grace is enough for any social injustice. God’s grace is enough for any loss that we go through. God’s grace is enough for any loneliness that we experience, for any relational strain and for any relational rejection.

Laura

“When it feels like hope can’t be found, when we don’t even know how we’re going to put one foot in front of the other,” she continues, “Scripture teaches us that’s when grace abounds.”

“Worship at the very core of what it is is ‘worth-ship.’ It’s the easiest definition I’ve ever heard of worship. It’s giving God worth, and sometimes that means verbal adoration and praise. Sometimes that’s showing Him worth with our calendars and our checking accounts. No matter what it is, it always begins with open hands. It always begins with a willingness to say, ‘You are worth whatever cost you call me to give,’” she maintains. “Worship in its very core begins with surrender. That’s how we really show God that He’s worth it all.”

You can follow Laura Story at:

Website

Twitter

Facebook

Instagram

You can Buy Laura Story – Open Hands at:

iTunes

Amazon

As part of my review, I also get to give away one copy of Laura Story – Open Hands CD.

Disclosure (in accordance with the FTC’s 16 CFR, Part 255:  “Guides Concerning the Use of Endorsements and Testimonials in Advertising”):  Many thanks to Propeller Consulting, LLC for providing this prize for the giveaway.  Choice of winners and opinions are 100% my own and NOT influenced by monetary compensation.  I did receive a sample of the product in exchange for this review and post. Only one entrant per mailing address, per giveaway.  If you have won a prize from our sponsor Propeller /FlyBy Promotions in the last 30 days on the same blog, you are not eligible to win.  Or if you have won the same prize on another blog, you are not eligible to win it again.  Winner is subject to eligibility verification.

Murder on the Moor – Book Review

I received a copy of this book free for purposes of my review. All opinions are my own.

I just love Juliana Deering’s Drew Farthering Murdery Mysteries! Murder on the Moor is the fourth in her Drew Farthering Murder Mystery series. I have already read the previous three and Murder on the Moor is a terrific addition to this collection. In fact, it may very well be my favorite.

Juliana Deering seems to be a fan of the classics. In each of her books she highlights a well known mystery writer. This book, was all about Sherlock Holmes and the Hound of the Baskervilles by Sir Arthur Conan Doyle. She does make references to other Sherlock Holmes stories but isn’t shy about having her characters call attention to similarities between their story and the Hound of the Baskervilles. I’m quite a Sherlock Holmes fan and thoroughly enjoyed the references.

There’s been a murder out on the Moors. Can Drew and Madeline find the murderer before someone else is murdered? The moors are a great place for mystery, getting lost, looking for a murderer, and lots of other great drama. I really enjoyed this book, it’s exciting and mysterious from beginning to end with fun plot twists and plenty of mystery.

The little town of Bunting’s Nest hasn’t seen a murder in ages so the police are only too happy to have Drew Farthering in on the case. As the mystery and suspense grow, it’s up to Drew to find the killer before it’s too late.

If you’re looking for a fun, entertaining, and well written murder mystery. You’ll love this book!

.: This post does contain affiliate links :.

How To Draw a Giraffe

IMG_20170218_144348215

Our Book for our monthly Book Craft Challenge was “Giraffes Can’t Dance” by Giles Andreae and Guy Parker-Rees. I’d never read this book so I checked it out from the library – along with the half of the library that my kids selected – and read it with the kids.

I was trying to come up with a giraffe craft to do and my kids didn’t want to do anything with constructions paper. Finally, my 8yr old suggested that we draw a giraffe. So I drew, and she drew. Her giraffe dances way better than mine! And then my 6 yr old and 3 yr old colored all my giraffe pictures.

IMG_20170218_145729426

This book is super cute and so much fun. The rhyme is great and it’s pretty short so you can read it multiple times without getting tired. My kids loved drawing and coloring Gerald!

Use a pencil, write lightly, so you can erase as needed.

Step 1. Draw an outline for the body, neck, and head. Write lightly, because a lot of these lines will be erased later.

IMG_20170218_140820140_TOP

Step 2. Add some legs. Gerald (the Giraffe) had long, gangly legs so no need to be perfect.

IMG_20170218_141009649

Step 3. Add some details. Tail, mane, horns, ear, fill out the eye and mouth a bit.

IMG_20170218_141259691

Step 4. Erase your extra lines. Aren’t you glad you drew lightly? Color in the tail, hooves and any other dark areas.

IMG_20170218_142315579

Step 5. Draw your spots, color in your giraffe.

IMG_20170218_145345218

Or, draw your spots and let your kids color in the giraffe. Be creative, My 8 yr old made her giraffe dancing.

giraffe

Check out these other fun Giraffe Crafts!

Giraffe's Can't Dance Craft - Monthly Crafting Book Club is celebrating Giraffe's Can't Dance Crafts this month with a group of bloggers and crafts to show that Giraffes CAN dance.

This post does contain affiliate links.

Chick Fil A Upcycle Challenge

I’m part of a ChickFilA mom’s panel and for February they are having a upcycle challenge with the Chick Fil A soup bowls.

IMG_20170215_131146104Which, if you haven’t tried their soup. You need to. My kids love the chicken noodle and the southwestern chicken is my favorite, even though I don’t usually enjoy spicy foods.
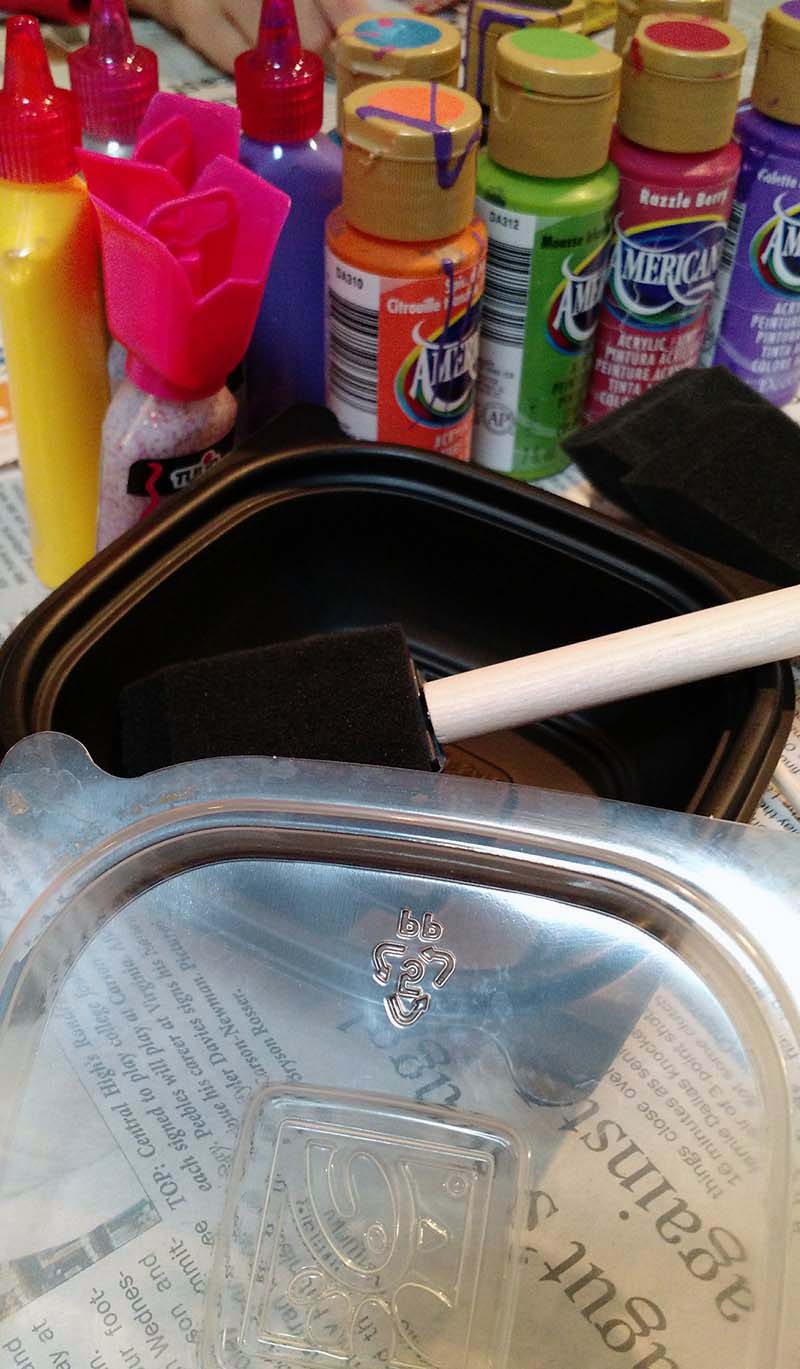
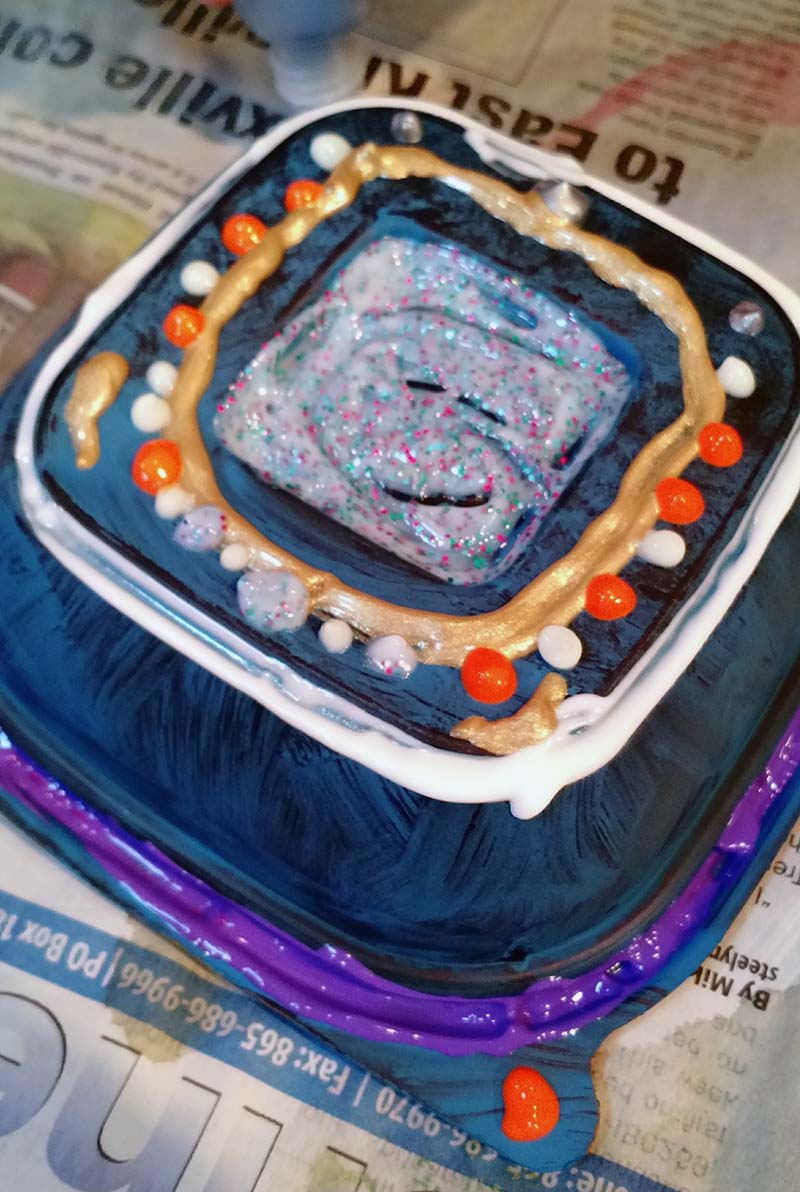
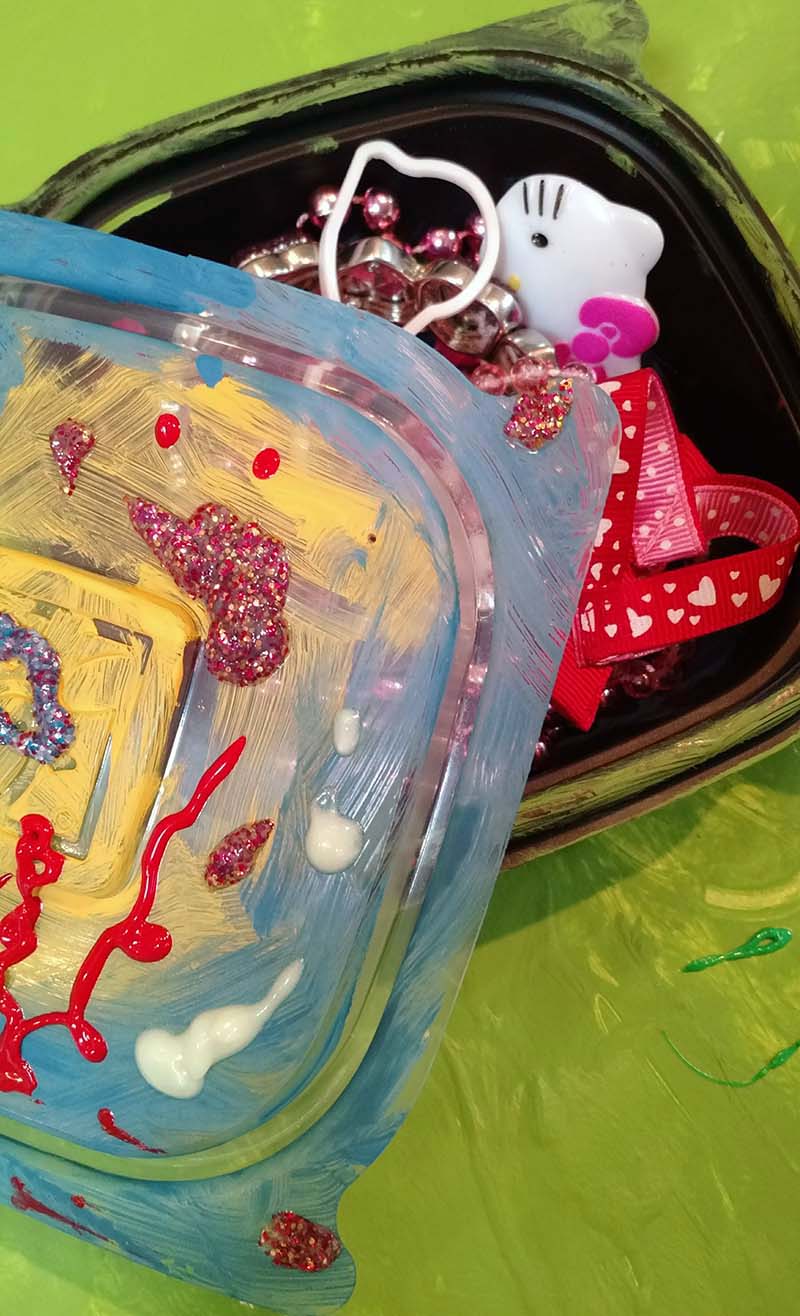
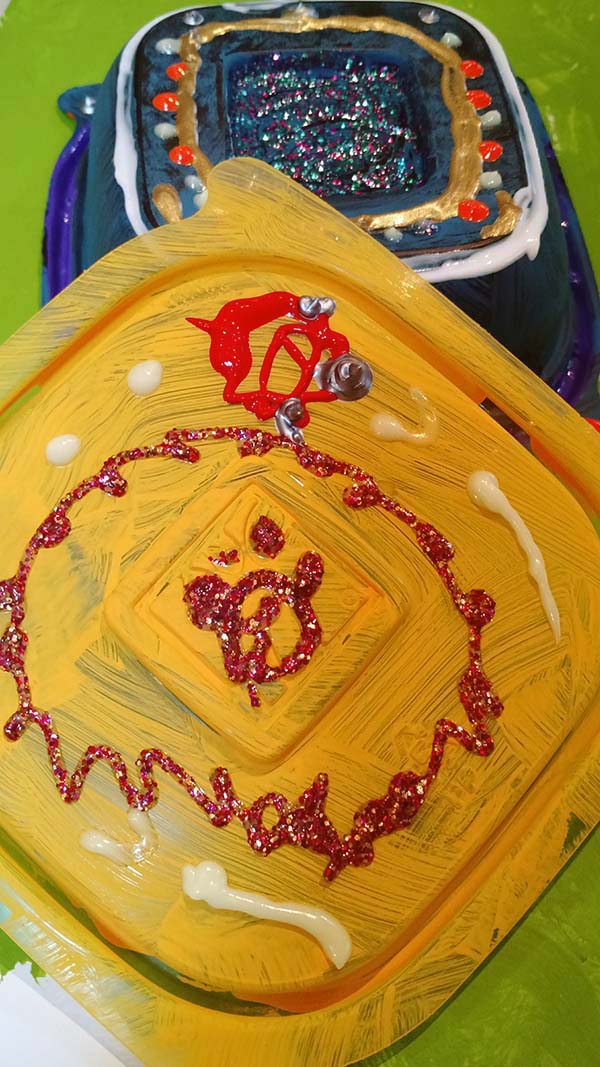
Then we took our soup containers and the girls made little jewelry boxes. This was a fun and easy craft and we made something useful – just maybe their jewelry will end up in these boxes and not all over the floor!

IMG_20170215_131643749

Supplies:

  1. ChickFilA soup container – washed and dried
  2. Paint – we used acrylic paint and some puffy paint
  3. Newspaper – for covering your surface, you don’t want to be cleaning acrylic paint off your table
  4. Paintbrushes – we used foam brushes and regular brushes, it’s all about how you prefer to paint
  5. Cup of water – for rinsing brushes
  6. Paper towels – for drying brushes, wiping hands, etc.
  7. If your kids are doing the painting I also recommend an old shirt or paint smock for them.

IMG_20170215_160331108

Instructions:

  1. Wash and dry your containers
  2. Spread newspaper over your work surface
  3. Paint containers with the acrylic paint. You might want a couple of coats if you want more coverage, I tried to convince my kids to use more paint but they really liked the textured look they were getting with just one coat. Rinse and lay out your brushes to dry. Let your containers dry completely
  4. Add designs with the puffy paint. My girls attempted to draw jewelry with their paint. They even traced the Chick Fil A logo on the lid of their containers because they love Chick Fil A and thought it was so cool to have Chick Fil A jewelry boxes. The puffy paint is also great for keeping the containers from sliding around on hard surfaces. Let this dry overnight or however long your puffy paint says.
  5. Fill with jewelry 🙂

This project was so much fun and let the kids get super creative.

IMG_20170216_115123434

IMG_20170216_114941979


Starting Again

We all hate starting over – at least I do, so I assume everyone else does. Even my kids hate starting again. Because usually we’re starting over because we got something wrong. And if there’s anything worse that starting over, it’s admitting that I’ve gotten something wrong.

I often have to remind myself of my favorite teaching phrase for my kids. “If you’re not making mistakes, you’re not learning”. My daughter gets frustrated because she has to re-start a division problem that she just got all wrong. My middle child really doesn’t want to try to read that word for the 5th time. And my toddler simply does not want to attempt putting that there one more time.

But I’m the same. I would honestly prefer that my banana creme pie didn’t turn out as soup the first time. I figured out why, it’s some chemical breakdown of the corn starch if you cook it too much. But it turned out right the second time. I just had to try again.

I’ve watched my kids refuse to try something because they were afraid of failure. I’ve failed to try things because I’m afraid of failure. And I hate starting over.

But, like I tell my kids, starting over is how we learn. If I’m getting it all right all the time then I’m not growing, and I’m not learning, and I’m not getting any better at anything. I’m just doing what I already know.

Truth be told, most great successes, have a string of failures before them. Most of the time, before someone succeeds at something they have to start over again and again. Thomas Edison is famous for saying “I have not failed. I’ve just found 10,000 ways that won’t work”. He started over so many times, and eventually succeeded.

One thing I’ve been working to teach my kids is to not be afraid of starting over. Go, try, make the mistake, take what you’ve learned, try again. Each time you do this you’ve learned something and you’ve increased your chances of getting it right the next time.

Of course, this means that I have to be an example and try new things, and try new things again.

So far this year, I’ve learned how to NOT make a banana creme pie and I’ve learned how to make a banana creme pie. Now if I could just figure out a good sausage gravy and biscuits…

What’s something you’ve had to start again this year?

This #BloggersTalkingAbout series features amazing bloggers writing from the heart. Continue reading more by following these links. Starting Over by Joanne | Starting Again by Jenny | When It’s Time To Start Again by Traci | Making Mistakes by Karen | Starting Over by Alicia | Crafty Me by Karen | The Delicate Art Of Starting Again by Nikki | Starting Over by Brandy | Starting Over by Wendy | If you’re a mom/female blogger, join us in our group, Bodacious Bloggers

What my Kids think of the New Baby

I have 3 children and while they each are super excited that we’re having another baby – they’ve been asking for one for basically forever – their responses have all been different. I can’t wait to see what they all think once the baby is here!

First. Here’s what they all have in common. They want a boy. We’re going to have to find out gender just in case this baby is a girl so they can get over the disappointment before the baby arrives. Though, they seem to have varying reasons for wanting the baby to be a boy.

Oldest –

My oldest is 8 and is super excited to have a baby to “take care of”. She was almost 5 when our youngest was born so I’m pretty sure she doesn’t exactly know what this means. However, she’s old enough to be quite a bit of help and I think she’ll actually enjoy the baby, since she loves babies.

She wants me to have a boy so things will be even. We’ll have 2 girls and 2 boys and everyone will have someone to play with. Honestly, she’s just excited about a baby and she’ll be happy either way. Thanks to her, basically every checkout clerk in the city now knows that I’m pregnant!

Middle –

My middle child is super sweet but is a bit more shy around babies. I think she’ll do just fine with a baby sibling. She’s excited, and likes to give the baby (my stomach) kisses. Just wait until the baby can kick hard enough for her to feel it. She’ll most likely be glued to my side from that moment on.

She wants a boy because she wants to remain my “baby girl”. Which is my nickname for her. I assured her that she can keep the nickname regardless of the baby’s gender, but I don’t think she’s convinced. She tries to pretend that she just wants her brother to have someone to play with, but she really just wants to be the youngest girl. It’s tough being the middle child, so I understand her wanting to hold on to the baby girl spot.

Youngest –

He’s 3 and knows basically nothing about babies. He has grand plans of the baby playing with his toys and hanging out in his room to play every night. Being the only boy, he has his own room and isn’t happy about it. He hears his sisters chattering and playing at bedtime and he wants a bedtime buddy.

I’ve assured him that the baby can be in his room – actually, in a 3 bedroom house, the baby kinda has to share a room with him – and he’s super excited. He wants a brother so he has someone to play cars and super heroes with. He has no idea what sharing a room with a baby will be like. I’m not certain he’ll be happy at first but once the baby starts getting more playful he’ll be so happy to have a playmate. The trick will be keeping him from handing small objects to the baby.

I want to know. What did your kids think when you announced an upcoming baby?

Tips for Dealing with Morning Sickness

I’m currently pregnant with my 4th child and “enjoying” all the 1st trimester joys of morning sickness. Luckily for me, my morning sickness (all day sickness) is only in the 1st trimester. I’m not sure what would happen in my house if it lasted any longer.

As I’m lying on the couch sick, I comfort myself with the fact that morning sickness is a good sign. Or it’s supposed to be. It means my baby is busy growing (i.e. making me sick). Doesn’t make me actually feel any better. It’s just nice to know.

With 3 kids and a pretty full schedule, I do often have to just muscle through the nausea, back pain, and exhaustion.

Though, by 4 I have gotten a little better at just rolling with it. If you’re struggling with morning sickness, here’s a few things that might help.

1. Find a good prenatal vitamin – I don’t mean find the one with the most iron or the biggest pill you can find. Find something that your body can stomach, and that actually helps you. I really struggle with this. I need a vitamin without iron and have you seen the amount of iron is most prenatal vitamins! I’ve resorted to taking children’s vitamins every couple of days because that was all I could handle.

Finally, after my 3rd pregnancy I discovered Premama Vitamins. They also have vitamins for fertility and lactation. You can get a flavorless powder that you mix in any drink (juice is recommended, I tried it in a carbonated beverage once and it foamed up and bubbled out of the cup and all over the counter!). Or you can get a citrus flavored powder.

Either one works great. It has all your folic acid, DHA, etc. and while it has some iron, it doesn’t have a ton. Plus, my morning sickness is actually less when I’m taking it. It’s the only prenatal vitamin I’ver ever taken that has helped me feel better.

This might not be the one for you, but if you’re struggling like I was because prenatal vitamins were so hard on my stomach, you should give this one a try. It’s making handling my morning sickness so much easier!

They’re available on Amazon and in most drug stores like CVS and Walgreens.

img_20160702_1822212702. Rest – I know you want to keep getting everything done. But listen to your body and get some extra sleep. I always have oodles of energy in the 2nd trimester to make up for my exhaustion 1st trimester.
A good prenatal vitamin can help some with the exhaustion. But, listen to your body and get some extra rest. And don’t feel bad about your messy house. You are growing a baby.

I find that taking some time during the day to just sit helps a lot. I’ll read a book, answer e-mails, work on my blog, etc. Anything that’s non-stressful. But just stopping and sitting for a few minutes here and there really helps.

3. Ginger, Lemon, Citrus – All 3 are great for helping settle an upset stomach. For me, Ice water with lemon is super helpful. Helps me stay hydrated and the lemon helps settle my stomach a bit.

I also like a ginger tea. It’s nice and warm and also helps me stay hydrated. You can get ginger chews as well if you’re not a fan of tea.

Oranges are great for digestion. Plus they have vitamin C and some fiber. You really can’t go wrong with these. Get the little mini oranges and you’ll have something perfect for a midnight snack or really a snack any time you’re needing a little something.

img_20160801_1224452474. Pace your eating – Take your time. You’ll do better if you don’t eat random large meals. Start your morning with a few crackers by your bed, make a cup of tea, etc. Something small. Then move on to breakfast. Oatmeal or something else easy on my stomach is my preference.

Keep healthy snacks on hand like celery sticks, peanut butter, cheese, or fruit. And snack on something good for you when you start feeling a little hungry. You might not eat as large a lunch or dinner as you did pre pregnancy because you’re snacking. Don’t worry about it. You honestly don’t need many extra calories the first trimester. Just focus on eating small meals with foods that are good for you.

And remember, there’s a tiny human growing inside you. Your body is working hard. So, don’t feel bad about taking it easy and listening to what your body needs.

Caring for Myself in My First Trimester

Aside from the actual delivery. First Trimester is by far my least favorite part of pregnancy. I have morning sickness – really all day sickness – from about 4 weeks until week 13. And with 3 kids, homeschooling, and a small business, keeping up while I’m sick is a challenge to say the least.

This is my 4th pregnancy, and if there’s anything that I’ve learned about my first trimester it’s to give myself permission to just take it easy.

Here’s just a few ways I take care of myself – and of course the new little baby – during my first trimester.

  1. Extra Sleep – Something about the hormones, I’m way more tired than normal. As in 10 hours of sleep at night and a nap tired. Of course, the more tired I am, the more sick I feel, so if I want to get anything done, I do actually need to sleep. And, technically, I’m sleeping for me and the baby, and everyone knows that babies need lots of sleep.
  2. Special Snacks – Another fun thing about the first trimester. I’m hungry all the time. Because I get less sick if I perpetually snack (rather than eat all my food in 3 meals a day) I do go ahead and purchase snacks that I’m craving. This pregnancy I’m craving oranges and avocados (eaten separately), both snacks that are definitely good for me. I’m not actually craving any unhealthy snacks this time around (one pregnancy it was krispy kreme doughnuts) so I’m pretty much allowing myself to snack as much as I want on what I want. I do limit the unhealthy snacking to my normal snacking limits. It’s important to eat well.
  3. Frequent Snacking – I feel better if I snack frequently. So I keep nuts and/or granola bars in the car for when I need a snack while on the go. What I have depends on how many of my snacks my kids “stole”. My kids just love all this extra snacking! Normally, I don’t do this, but, in the interest of feeling well, it’s good for me to do.
  4. Relaxing – I like to be on the go and I like to be busy. I also really want to rearrange the kids bedrooms. But all that stuff is going to have to wait until the second trimester when I have the energy to do it. I do manage to keep the house picked up – most of the time – which I think is pretty good with 3 kids. I constantly have to remind myself that it’s perfectly ok to take a break and finish the laundry tomorrow (guess what I didn’t finish today). A lot of times relaxing just means that I’m sitting down working on my blog, catching up on e-mails, or reading a book. Just something that lets my body rest.
  5. Vitamins – For some reason I don’t handle multivitamins very well. They make me sick. So, combine morning sickness with prenatal vitamins making me sick, and well, let’s just say that every pregnancy so far I’ve just given up on the vitamins. Whenever I discover a new prenatal vitamin I try it out for a week (even when I’m not pregnant) just to see how I handle it, and it never goes well. This time around I found a brand called Premama that actually works for me. Horray. It does actually help some with the morning sickness and energy. So I’m finally able to get those extra vitamins that I’m supposed to have without making myself sick.
  6. Pregnancy Brain – So I explained the concept of pregnancy brain to my 8 and 5 year old. I was having a really bad day forgetting things. And now, I’ve basically been given a pass to forget any and everything the entire time I’m pregnant. If you have kids, I highly recommend you do this. It’s honestly a great way to get away with things and have them be ok with it.

So, Mommas, tell me in the comments below, what are some special things you’ve done for yourself during your pregnancy? Or tell me about your favorite food craving?

This #BloggersTalkingAbout series features amazing bloggers writing from the heart. Continue reading more by following these links. Loving Yourself by Joanne | Loving Yourself This Valentine’s Day by Traci | New Routine & New Doctor by Karen | Care For Yourself By Reducing Anxiety & Worry by Karen | Permission To Cry by Brandy | Caring For Myself In My First Trimester by Jenny. If you’re a mom/female blogger, join us in our group, Bodacious Bloggers

Ladybug Girl Craft

Ladybug Girl and Bumblebee Boy is one of my children’s favorite books. We received this book years ago as part of Dolly Parton’s Imagination Library program. Which is a program she started here in Tennessee that mails each child under 5 one free book a month. We’ve discovered some truly awesome children’s books this way!

Since I have boys and girls, Ladybug Girl and Bumblebee Boy is a great book to read to all of them together, because there’s a fun character for each of them to follow along with.

And since all my kids love dressing up, this book is just so much fun!

I was excited when I saw that my monthly crafting book club was doing Ladybug Girl this month. My kids love this book, and they had so much fun making their own ladybug.

Supplies

Black Construction Paper
Red Construction Paper
White Paper
Scissors
Craft Glue
Pipe Cleaner

LadybugSupplies

Directions

  1. Cut 2 red circles – I folded my paper in half and cut them together so they’re exactly the same size.
  2. Cut one of these red circles in half.
  3. Cut 1 black circle – about 1/3 the size of the red circles
  4. Cut many tiny black circles of varying sizes
  5. Cut your pipe cleaner into six equal pieces
  6. Cut two eyes – I folded my paper in half and cut them together so they’re the same size.

LadybugSupplies2

  1. Glue the black circle to the top of the red circle.
  2. Glue the two red half circles on top of the head, open them up as little or as much as you want for wings.
  3. Place some glue on the ends of each pipe cleaner piece and insert them between the red circle and the red half circles.
  4. Glue the eyes on the head
  5. Glue black dots on your red ladybug
  6. Let it dry before play with it

Ladybug2

This post does contain affiliate links.

Did you get a chance to see the other amazing crafts shared below by the other fabulous bloggers???